Tankless water heaters are known for their energy efficiency, compact design, and ability to deliver hot water on demand. Still, for many homeowners, they also come with a steep learning curve. From mysterious error codes to unclear warranty terms and inconsistent maintenance advice, it’s no wonder users often turn to online forums like Reddit for answers.
Unfortunately, much of the information found online can be vague, outdated, or incorrect. That’s why we’ve compiled clear, reliable answers to the most frequently asked questions about Noritz tankless water heaters.
The following Q&A addresses common concerns with straightforward, easy-to-follow guidance. It will help you make informed decisions and keep your system running efficiently for years to come.
1. When Should I Perform Maintenance on My Tankless Water Heater? Homeowners should have their systems maintained once a year to ensure they are working properly. However, other factors may cause your system to need to be maintained multiple times a year. The most common are usage and water quality.
Larger families or households that use large amounts of hot water will experience mineral buildup more quickly. More water flowing through the unit equals more wear over time. If you live in an area with hard water (such as the Southwest, Midwest, and parts of the Southeast), your system will accumulate scale and minerals faster, shortening its lifespan and reducing efficiency. Hard water is simply water that’s packed with minerals like calcium, magnesium, and manganese. While these chemicals might not sound like troublemakers, they can cause buildup in your plumbing over time, clog pipes, and even wear down your water heater, leading to costly repairs.
Checking water hardness maps for your area can give you a good idea if your water is hard. But for the most accurate answer, it’s worth doing a quick test. Once you know your results, you can take steps to protect your system.
We recommend descaling every one to three years to keep your tankless water heater performing at its best and protect your warranty.
Noritz tankless water heaters require a specific maintenance sequence to register a successful flush. That’s why it’s best to hire a certified plumber or use Noritz’s online “Find an Installer” tool to locate professionals trained on their systems.
2. What Do Noritz Error Codes Mean—and How Do I Fix Them? Error codes are your heater’s way of waving a red flag. Each code points to a different issue, and some can be quite technical. ● Error Code 11 —Ignition Failure: This usually means the heater couldn’t start a flame. Causes include low gas pressure, a faulty igniter (like the spark on a stove), or airflow issues like blocked vents. ● Error Code 16 — Abnormally High Outlet Temperature: If your water is set to 120°F but comes out at 140°F, it may be due to scale buildup or a stuck internal valve. These factors prevent proper heat regulation. ● Error Code 29 — Condensation Drainage Problem: Tankless units produce condensation, which needs a clear drainage path. Blockages caused by debris (like leaves) can cause this error. ● Error Code 45 — Water Leak Detection: This code indicates an internal water leak. A sensor located at the bottom of the unit, behind the circuit board, detects when water has accumulated in the well to a level that triggers the sensor. ● Error Code 71 —Gas Solenoid Valve Drive Circuit Abnormality: This code typically indicates that the voltage supplied to the gas valve is either incorrect or absent. Most error codes are not beginner-friendly fixes. If you notice any of these, contact a professional and avoid attempting DIY solutions.
3. Should I Repair or Replace a Cracked Water Heater? If you notice a crack or leak, the most common cause may be a problem with the heat exchanger. Your next steps depend on the severity and cost of repair.
If the leak is minor and caught early, replacing just the heat exchanger might be sufficient. Let the internal cabinet dry, and your system may be as good as new. Suppose the leak causes significant internal damage, such as a component breaking or the heat exchanger cracking and causing issues inside the cabinet. In that case, you may need to replace everything that was damaged.
However, is it cost-effective? A complete replacement could be more economical than part-by-part repairs, especially if the unit is nearing the end of its warranty.
For example, suppose you have a Noritz unit that is around 11 years old. You're experiencing issues and need to replace the heat exchanger. Noritz's heat exchanger is covered under a 12-year warranty (as long as the system is maintained correctly). In that case, Noritz can send you a replacement heat exchanger at no cost for the part itself. However, labor is not included under the warranty, so you'll still need to pay a plumber for the installation. Depending on your local rates, that could cost you between $600 and $700.
At that point, it may be more practical and budget-friendly to invest that same amount in a brand-new unit, which comes with a refreshed full warranty, rather than spending it on repairs for a system nearing the end of its coverage.
Ask yourself: "Is the juice worth the squeeze?" Starting fresh might be a more financially sensible option if your plumber quotes a repair that costs nearly as much as a new unit.
4. How Does a Noritz Warranty Work? Does It Transfer to New Homeowners? Noritz warranties are intended for the original purchaser and become effective upon proper installation and registration of the unit. If you are buying a home that already has a Noritz water heater, it is important to know that the warranty does not transfer to you as the new homeowner. The only exception to this is in the case of a brand-new construction home; in that situation, you will still be covered as the first owner.
Noritz offers different warranty lengths depending on the tankless water heater model. Non-condensing models come with a 12-year warranty on the heat exchanger, while newer condensing models, including the gunmetal gray cabinets, are covered for 15 years. The EZ Pro Series, which features a top-mounted connection design, offers the longest coverage with a 25-year heat exchanger warranty.
Regardless of the model, all units come with a standard five-year parts warranty and a one-year labor warranty. To determine if your unit is still covered by warranty, contact Noritz technical support and provide your unit’s serial number. They will help you confirm registration and let you know how much warranty time remains.
5. Why Is My Water Heater Making Noise When Using Hot Water? When you hear a noise coming from your tankless water heater, the first thing to ask is whether it is mechanical or machine noise.
It is common for tankless units to make noise when they turn on and start circulating water, similar to a quiet humming or possibly even a vibration or rattling. Other common noise causes include loose mounting brackets, which can cause the unit to rattle against the wall, or internal vibrations from parts that are not properly secured. In some cases, the noise may also be due to a worn or failing component that needs to be inspected or replaced.
However, if your heater starts sounding like a foghorn, honking, or shaking violently, nine times out of 10, you might have a gas pressure issue. Your gas pressure may be too low.
Another possible cause is the manifold pressure, which is adjustable on the unit's gas valve. If this pressure is even slightly off, it can lead to issues like howling or vibrating sounds. You're more likely to encounter this issue with propane heaters, as Noritz units are typically configured for natural gas, the most common gas type.
When homeowners are converting a unit from natural gas to propane, it's crucial to fine-tune the manifold pressure correctly. If it's not properly adjusted during the conversion, unusual noises and performance issues can occur.
Again, if you fear that these noises are often signs of serious issues, a professional plumber should diagnose them.
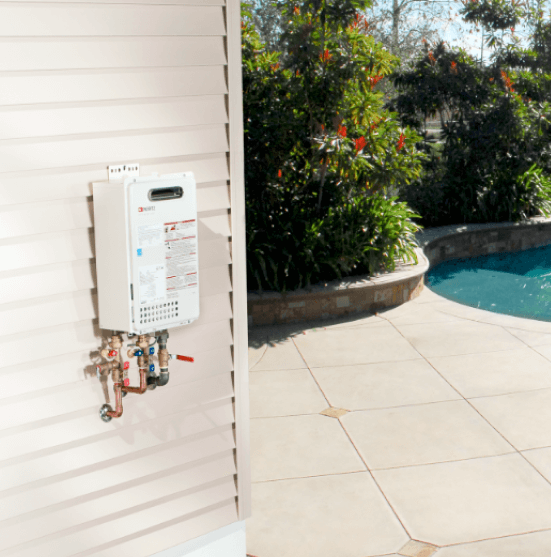
6. How Do I Properly Descale My Noritz Tankless Water Heater? Note before starting: On the unit, the red isolator valve indicates the hot water side, while the blue isolator valve indicates the cold water side. Drain caps are located on top of the hot side and on the left of the cold side. Turning the valves to the vertical position indicates they are “on” and that water is free flowing. Turning the valves to the perpendicular position indicates they are “off.”
Special Notes for Newer Models: ● For newer models, there is a blue clip labeled “Flush” in the bottom left-hand corner that must be plugged in for the unit to register the flush. ● For the newest Pro Series models, there is a Descale Mode that must be enabled through the app before beginning.
-
Keep the unit on but turn the gas valve off.
-
Turn both hot and cold valves off and remove the drain caps on both valves. Place the five-gallon bucket underneath the hot-water side. Carefully turn the red drain valve to the “on” position and use the bucket to drain the unit of excess water still inside.
-
Repeat step two on the cold water side.
-
Connect a hose to the submersible pump and place the pump with the connected hose into the five-gallon bucket. Make sure the power cord stays out of the bucket.
-
Connect the pump outlet hose to the cold water drain valve.
-
Connect a drain hose to the hot water drain valve and place the end of the drain hose into the bucket.
-
Pour three to four gallons of vinegar into the bucket to completely submerge the pump. Open both drain valve lever handles on the isolation valves and turn on the pump for at least an hour. For maximum effectiveness, change the vinegar solution after 30 minutes and repeat. The unit will try to fire up, but will fail due to the gas being off. Eventually, an Error Code 11 will appear, which is normal during the procedure. DO NOT RESET.
-
After a minimum of one hour, turn the pump off and close the cold water drain valve. Remove the hose from the cold water drain valve and replace the cap onto the drain valve outlet.
-
Remove the pump and drain hose from the bucket and drain the liquid. Place the hot water drain hose back into the empty bucket and open the cold water main valve. This procedure will flush out the heater with fresh cold water. Flush for at least five minutes or until 20 gallons of water have passed through the heater.
-
For condensing units, place a bucket under the unit and twist open the drain cock located directly under the water heater to drain out any descaling medium that may have collected in the unit. Turn the main inlet valve to the “OFF” position.
-
For additional maintenance, unscrew and remove the water filter for cleaning—some water may flow out. Clean the filter under running water to remove any debris. Place the dry filter back into the port, making sure it’s twisted tightly by hand.
-
Turn the drain valve to the “OFF” position. Unscrew and remove the drain hose. Replace the drain cap and make sure it’s screwed on tightly.
-
Turn the main hot and cold valves back to the “ON” position and turn the gas supply back on. To get rid of the Error Code 11 that resulted from descaling, reset the unit by powering it off, then powering it on again.
See this descaling guide for more step-by-step information on the process.
Owning a Noritz tankless water heater has numerous benefits, but it's helpful to understand how it works like any advanced appliance. Whether you're troubleshooting error codes, dealing with unusual noises, or determining if your unit is still under warranty, having accurate information is crucial.
This guide was created to address the most common questions and concerns we encounter from real users, particularly those seeking answers online. With the proper knowledge, you can make informed decisions, protect your investment, and ensure your hot water system runs smoothly for many years.


.png)

